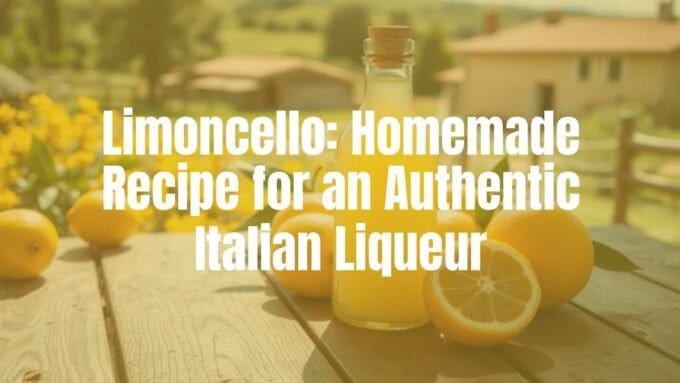
Want a taste of Italian sunshine? An authentic homemade limoncello recipe is your ticket. This bright lemon liqueur from Southern Italy is easy to make at home. Skip the store-bought bottles; homemade lets you choose better ingredients and get a clean, bold lemon flavor with a sweet, tangy finish that beats most brands on the shelf. It uses only three ingredients and, once you learn the steps, every sip can take you straight to the Amalfi Coast.

What Is Authentic Homemade Limoncello?
Authentic homemade limoncello is a classic Italian lemon liqueur known for strong citrus flavor with a smooth balance of sweet and tart. It’s more than a drink in Southern Italy-people often enjoy it after a meal. The secret is simple: oils from fresh lemon peels, high-proof alcohol, and a simple syrup. You end up with a smooth, sunny yellow drink that captures the character of Italian lemons.
Origins and History of Limoncello in Italy
Limoncello comes from sunny Southern Italy, especially the Campania region-Naples, Sorrento, and the Amalfi Coast. Its early story is part legend and part history. Some say people in ancient Rome enjoyed similar drinks, with hints found in Pompeii frescoes. Others credit monks in the 1700s. A widely told story points to Antonia Farace on Capri in the early 1900s, who served her lemon liqueur to guests. Her son later registered the brand, leading to wider production and global fame.
Today, limoncello is a symbol of Campania and holds Protected Geographical Indication (PGI) status. That means true Italian limoncello comes from Sorrento, the Amalfi Coast, and Capri, where the climate and soil grow outstanding lemons. You’ll also find popular versions from Sicily and Sardinia, both known for great citrus.
Key Features of Authenticity in Traditional Recipes
For authentic limoncello, a few things matter most. First, use pure ingredients: lemon peels, high-proof alcohol, and sugar with water for syrup. No artificial colors or preservatives-this keeps the taste clean and bright.
Next, careful peeling matters. Use only the yellow zest loaded with oils and avoid the bitter white pith. This keeps the flavor clean and strong. The long soak is also very important. Traditional recipes let peels steep in high-proof alcohol for weeks to pull out aroma and flavor slowly. This patient method gives limoncello its bold lemon taste and rich yellow color.
Why Make Limoncello at Home?
Making limoncello at home is satisfying and fun. It’s more than a kitchen project; it brings you closer to Italian tradition and lets you offer a custom drink made with care.
The process itself is part of the joy. You pick the lemons, then watch the alcohol turn bright yellow over time. The hardest part is waiting for the peels to infuse-proof that the method is simple by nature. Doing it yourself lets you control quality and flavor in a way store bottles can’t match.
Benefits of Homemade Versus Store-Bought Limoncello
Homemade limoncello often tastes better-clean, bright, and “way better than store-bought.” Fresh ingredients and no additives make a big difference. You skip preservatives, so the lemon flavor stands out.
It can also cost less per liter, especially if you make a larger batch. While good alcohol costs more upfront, you’ll usually save compared to premium brands. You also choose the ingredients: organic lemons without pesticides or wax (important since you use the peel). That level of clarity on what’s in your drink is rare with mass-produced bottles. And a homemade bottle makes a warm, thoughtful gift that says “ti voglio bene” like few things do.
Essential Ingredients and Tools
Starting your limoncello project takes only a few good ingredients and basic tools. The recipe is simple, but using the right items matters if you want that classic Italian taste. Think of it like building with a few strong pieces-each one counts.

Great lemons supply the flavor. The alcohol pulls out those oils. The simple syrup balances it all so it’s smooth and easy to sip. Keep these foundations strong, and your results will shine.
Best Lemons to Use for Authentic Flavor
Lemons are the stars here. Use organic, unwaxed lemons so pesticides or wax don’t end up in your drink. Go for large lemons with thick, textured skin; these often hold more oil, which gives better aroma and flavor.
In Italy, lemons from Sorrento and the Amalfi Coast-like “Femminello di Santa Teresa” and “Sfusato Amalfitano”-are prized. Elsewhere, Eureka or Lisbon (common in Florida and California) work very well. Meyer lemons make a slightly sweeter, softer limoncello; some say they taste a bit more herbal than classic versions. Whatever you choose, make sure they’re fresh, organic, washed, and dried before peeling.
Choosing the Right Alcohol Base
The alcohol you use matters a lot. High-proof alcohol, ideally 95% ABV (190 proof), pulls out lemon oils best and gives the cleanest result. Everclear is a common choice because it’s neutral and strong. Check the label-some Everclear is lower than 95%.
Some people use vodka, especially 100-proof. A lower proof will give a different taste and can feel sweeter and less intense. If you can’t find 95% grain alcohol, 100-proof vodka (50% ABV) is a workable option, though extraction will be weaker and the drink lighter. Skip expensive vodkas; their subtle notes won’t show here. Use a neutral, high-proof spirit that acts like a strong solvent for the zest.
Sugar and Water Ratio Advice
The simple syrup turns the lemon-alcohol mix into a smooth, sweet drink. The sugar-to-water ratio is key to balancing tart lemon and strong alcohol. A common start is 1:1 sugar to water. For example, 1 liter water to 800 grams sugar, or 4 ⅔ cups water to 2.43 lbs (1.1 kg) sugar, which makes about 2.5 to 2.7 liters of limoncello.
Adjust to taste. More water lowers the alcohol and makes a milder drink. More sugar makes it sweeter. Start with the standard syrup, blend, taste, then add more syrup if you want sweeter or softer flavor. Use white granulated sugar; brown sugar or honey will add caramel-like notes that change the classic profile.
Recommended Equipment and Bottling Supplies
You don’t need special gear, but these tools help and make the process smoother:
- Vegetable Peeler or Zester: Use a sharp peeler to remove only the yellow zest, avoiding the white pith. Many like a ceramic peeler to reduce oxidation. A microplane works too for a finer zest, but take care to skip the pith.
- Large Glass Jar with Airtight Lid: A jar of at least 1 gallon (3 liters) with a tight lid is great for infusing the peels in alcohol.
- Large Pot or Saucepan: For making the simple syrup.
- Fine-Mesh Strainer and/or Cheesecloth: Strain out peels after infusion. Line with cheesecloth or a coffee filter for extra clarity.
- Funnel: Helps pour neatly into bottles.
- Glass Bottles with Airtight Seals or Corks: Use clean, sterilized bottles. Swing-top or corked bottles work well. Sterilize by boiling 10-20 minutes or running a high-heat dishwasher cycle, then dry upside down.
How to Make Authentic Homemade Limoncello
Making limoncello is simple and rewarding. You’ll go from fragrant peels to a golden, lively liqueur that carries a piece of Italian tradition. Follow these steps and you’ll soon have your own batch.
Success comes from careful prep and giving each stage enough time. The longer it infuses, the deeper the lemon flavor. Don’t rush-you’ll taste the difference.
Step 1: Infusing Lemon Peels with Alcohol
The first and most important step is infusing lemon peels in high-proof alcohol. Wash and dry your organic lemons well. Be gentle so you don’t scrape away oils. With a peeler (ceramic is a nice option) or zester, remove only the yellow skin and avoid the white pith. Even a little pith can add bitterness, so precision helps. Plan on about 8-12 medium-large lemons for a batch that yields 2.5-3 liters.
Put the peels in a large, airtight glass jar. Pour in 95% alcohol (Everclear 190-proof is ideal) until the peels are covered. Close the lid and set the jar in a cool, dark cabinet away from light. Let it sit at least 15-20 days, and up to 25 days or even a month for stronger flavor. Some old-school methods go for two months. Shake daily if you remember, but don’t open the jar. Time develops a stronger lemon taste.

Step 2: Preparing and Adding Simple Syrup
While the peels infuse, make the syrup. This sweet mix balances strong lemon and alcohol. In a pot, combine measured water and white sugar. For a standard batch, use about 1.1 liters water and 1.1 kg (2.43 lbs) sugar, or adjust to your taste. Heat over medium-low and stir until the sugar dissolves. Do not bring to a hard boil; look for small bubbles just before a simmer. Gentle heat keeps the sugar from caramelizing and changing the flavor.
Remove from heat and let the syrup cool until warm. Add the infused alcohol to warm (not cold) syrup. This little trick helps give a deeper yellow color. Stir for a couple of minutes to blend well.
Step 3: Filtering and Blending the Liqueur
After 20-25 days (or up to a month), strain the infused alcohol and mix it with the cooled syrup. Set a fine-mesh strainer over a large bowl or measuring cup. For extra clarity, line it with cheesecloth or a coffee filter. Pour the lemon alcohol through and let the peels drain fully. Discard the peels; they’ll be bitter after soaking.
Mix the strained lemon alcohol with the warm syrup. Stir gently for a few minutes. It may turn a bit cloudy-this “louche” effect happens when lemon oils meet water. That slight cloudiness is a sign of classic limoncello. If it stays clear, it may be due to alcohol strength or temperature differences; it will still taste great.
Step 4: Bottling and Maturing Limoncello
Once blended and fully cooled to room temperature, it’s time to bottle. Use a funnel to pour into sterilized glass bottles. Make sure the bottles are spotless and sealed well. Swing-top or corked bottles are good choices and look nice for gifts.
Tighten lids and store in a cool, dark spot for about a week to let flavors settle and round out. For the best experience, serve ice-cold. Chill in the fridge or, better yet, the freezer for 3-4 hours before pouring. The alcohol and sugar keep it from freezing solid, so it pours silky and cold. This final chill makes a big difference.
Authentic Limoncello Recipe Card
Here’s a quick recipe for a traditional batch of homemade limoncello. You’ll get about 2.5 to 2.7 liters-plenty to share or enjoy over time.
Ingredients List
- 8 medium-large organic lemons (untreated, with thick zest)
- 1 liter (4 cups) 95% high-proof grain alcohol (such as Everclear 190-proof)
- 1.1 liters (4 ⅔ cups) water
- 1.1 kg (2.43 lbs) white granulated sugar
Instructions
- Prepare Lemons: Wash and dry the lemons. With a peeler, remove only the yellow zest, avoiding the white pith.
- Infuse Alcohol: Put peels in a 1-gallon airtight glass jar. Pour in the 95% alcohol to cover. Seal and store in a cool, dark cupboard for 25 days. Shake daily if you remember; don’t open.
- Prepare Simple Syrup: After 25 days, make the syrup. In a pot, combine water and sugar. Heat over medium-low, stirring until small bubbles form and sugar dissolves. Do not boil hard. Remove from heat and let it cool until warm.
- Combine & Filter: Place a fine strainer (lined with cheesecloth or a coffee filter for extra clarity) over a large bowl. Pour the infused alcohol through and discard peels.
- Blend: Add the strained lemon alcohol to the warm syrup. Stir for a couple of minutes to combine. Some cloudiness is normal.
- Cool & Bottle: Let the limoncello cool to room temperature. Use a funnel to pour into sterilized bottles with tight seals.
- Chill: Refrigerate or freeze for at least 3-4 hours before serving. It won’t freeze solid.

Notes for Best Results
- Pith is the Enemy: The most important rule: peel only the yellow zest. The white pith is bitter and will affect the taste.
- Patience, Patience: Don’t cut the infusion short. 25 days or longer brings out more flavor.
- High-Proof Alcohol: Use 95% grain alcohol (190 proof) for the most classic and bold result. Lower proofs taste different and often sweeter.
- Warm Syrup Trick: Blending with warm (not cold) syrup helps get that deep yellow color.
- Sterilization: Use sterilized bottles to keep your liqueur fresh longer.
- Serve Chilled: Serve from the freezer in chilled shot glasses. Skip ice cubes; they water it down.
Tips for Perfect Authentic Homemade Limoncello
Getting perfect limoncello comes down to small details. With a few smart tips, you can nail the balance of sweet, tart, and strong lemon flavor, plus that bright color. These ideas help you avoid common mistakes and lift your batch from good to great.
Even experienced Italian nonnas have tricks. From picking lemons to choosing how long to steep, these pointers will guide you to a limoncello that tastes like it came from the Amalfi Coast.
Mistakes to Avoid During Preparation
To make a reliable, tasty batch, avoid these common missteps:
- Including White Pith: This is the biggest mistake. The pith is bitter and will affect the taste. Be careful when peeling and aim for only the yellow zest. A tiny bit won’t ruin it, but too much will.
- Using Non-Organic or Waxed Lemons: Alcohol pulls out everything from the peel. Non-organic fruit can add pesticides or wax to your drink. Choose organic, untreated lemons.
- Rushing the Infusion: Give it time. Less time means weaker flavor. Aim for at least 20-25 days and keep the jar closed.
- Using Low-Proof Alcohol: While 80-proof vodka can work, it won’t give the same depth or full body as 95% grain alcohol. Lower proof extracts less and can taste too sweet or too mild.
- Boiling the Simple Syrup Too Hard: You want to dissolve sugar, not caramelize it. Keep it at a gentle simmer with small bubbles.
- Adding Infused Alcohol to Cold Syrup: Mixing with warm syrup helps create that bright yellow color. Cold syrup can lead to a lighter look.
Troubleshooting Cloudy or Bitter Limoncello
Here’s how to handle common issues:
- Cloudy Limoncello: A little cloudiness (the “louche” effect) is normal and shows you pulled good oils. If it’s very milky, it may be from mixing temperatures or alcohol strength. Try blending when the syrup is warm. Cloudy limoncello is still safe and tasty.
- Bitter Limoncello: Too much pith is the usual cause. Once bottled, you can’t remove the bitterness. For future batches, peel more carefully. If the current batch is too bitter, add a bit more simple syrup to mellow it, knowing it will lower the alcohol. In cream versions (crema di limoncello), milk and sugar can soften slight bitterness.
Expert Advice on Flavor Adjustments
Once you’ve got the basics down, tweak to your taste:
- Sweetness Adjustment: Start with the base recipe. If it’s too tart, make a small extra batch of syrup (½ cup water + ½ cup sugar), cool it, and add slowly until you like it. If it’s too sweet, add a little neutral high-proof alcohol to cut the sweetness; you may want to rest it longer so flavors settle.
- Alcohol Strength: 95% grain alcohol yields a stronger drink. For a milder version, increase water in the syrup to dilute more.
- Infusion Time for Intensity: Want more lemon punch? Let it steep longer-up to a month or even two for deeper, more layered citrus notes.
- Experiment with Citrus: Try the same method with oranges (arancello), limes, or grapefruit. Always use organic, unwaxed fruit.
- Olive Leaves: Some Italian recipes add a few olive leaves during infusion for a subtle, extra layer of flavor.
Common Questions About Homemade Limoncello
People often have similar questions about timing, safety, and strength. Knowing these basics helps you make a solid batch every time. Let’s answer the most common ones.
From how long to steep to how strong it ends up, getting these details right helps you make an authentic drink and feel confident in your new infusing skills.
How Long Should Limoncello Infuse for Best Flavor?
Infusion time shapes the taste and smell of limoncello. A good rule for a classic, balanced result is to let peels steep in high-proof alcohol for 20-25 days. This gives time to pull out the oils and bright flavor.
Some methods go longer-one to two months-for a deeper, more intense profile. Quick methods (1 day to 2 weeks) give some citrus notes, but 4-6 weeks builds a fuller, more layered drink. Patience matters; longer steeping equals stronger lemon flavor. Keep the jar in a cool, dark place and don’t open it during this period.
Is It Safe to Make Limoncello at Home?
Yes, it’s generally safe if you keep things clean and choose the right ingredients. High alcohol acts as a preservative. Keep these points in mind:
- Use Organic, Untreated Lemons: Since you infuse the peels, you don’t want pesticides or wax in your drink. Wash them well.
- Handle High-Proof Alcohol Safely: Grain alcohol is flammable. Store and use it away from heat or flames.
- Sterilize Equipment: Clean and sterilize jars and bottles by boiling 10-20 minutes or using a high-heat dishwasher cycle.
- Avoid Pith: Too much pith leads to bitterness. This affects flavor, not safety.
With clean tools, good ingredients, and careful handling of strong alcohol, your limoncello will be safe and tasty.
How Strong Is Homemade Limoncello?
Strength depends on the alcohol proof and the amount of water in your syrup. With 95% (190-proof) alcohol and a standard syrup ratio, the final drink is strong. Using 1 liter of 95% alcohol, plus 1.1 liters of water and 1.1 kg sugar, you can get about 43-45% ABV (86-90 proof).
Using lower-proof alcohol, like 100-proof vodka (50% ABV), gives a lighter drink. With the same syrup, you may end up around 25-30% ABV (50-60 proof). More water lowers the alcohol level. Limoncello is meant for slow sipping after meals, whatever the strength.
How to Store and Preserve Homemade Limoncello
After you’ve carefully made your batch, good storage keeps its bright flavor and helps it last. Limoncello keeps well because alcohol and sugar act like natural preservatives. A few simple habits will help every pour taste great, whether you drink it next week or next year.
Thinking ahead also makes limoncello a great gift. Make it early for holidays or events so flavors have time to settle and smooth out.
Recommended Storage Conditions
For best results, store limoncello in tightly sealed glass bottles. Alcohol and sugar naturally prevent spoilage. You don’t have to refrigerate unopened bottles, but a cool, dark spot keeps quality high over time.
For serving, keep at least one bottle in the fridge or, better, the freezer. It won’t freeze solid in a home freezer. This keeps it nicely chilled and ready to pour. Freezer storage also helps keep the lemon aroma and crisp taste.
Shelf Life and Signs of Spoilage
Homemade limoncello lasts a long time thanks to alcohol and sugar. In the fridge, it can keep for 1-2 years. In the freezer, it can last even longer without much change.
It doesn’t really “expire,” but the lemon aroma can fade after a while. For the best flavor, try to drink it within 12 months. Rare signs of spoilage include major color change (beyond normal cloudiness), a sharp off-taste, or odd smells. Heat can dull the flavor or cause spoilage. If it smells or tastes wrong, throw it out.
Serving and Pairing Suggestions
Limoncello is part of Italian table culture. Serving it the right way makes it even better. It’s a digestif, a cocktail base, and a flexible ingredient that can add lift to sweet and savory dishes.
Presentation matters too. A cold bottle, chilled glasses, and slow sips after a meal capture its charm. Here’s how to enjoy it fully.
Best Ways to Serve Chilled Limoncello
Limoncello is best served very cold. Don’t add ice cubes, which dilute flavor. Keep your bottle in the freezer for at least 3-4 hours before serving, or store it there all the time. Chill small shot glasses or ceramic cups in the freezer for 20-30 minutes before pouring.
Traditionally, people drink limoncello after dinner to help finish the meal. Pour into chilled glasses and sip slowly. It’s strong, so take your time. It’s also great in drinks: try it with sparkling water for a Lemon Fizz, or mix it into a spritz. It’s useful in desserts too-drizzle over fruit salad, spoon onto lemon sorbet or gelato, or use it in a limoncello tiramisu for a bright citrus twist.


Leave a comment